

To avoid skulls when chipping, always use the right drill bits for your material, keep your tools sharp, and maintain proper setup. Apply steady, controlled pressure and match your drill speed to the material’s hardness. Secure your workpiece well and focus on proper alignment and angle. Practice on scrap first to build confidence. If you keep these commandments, you’ll achieve cleaner cuts every time—stick around to learn more essential tips for perfect chipping.
Key Takeaways
- Use the correct drill bits for your material to ensure clean cuts and prevent damage.
- Keep tools sharp and well-maintained to improve performance and avoid excessive force.
- Secure your workpiece properly to maintain stability and control during drilling.
- Apply steady, gentle pressure and maintain proper drill angle for precise, skull-free chipping.
- Practice on scrap material first to refine technique and avoid damaging your final workpiece.

DEWALT Drill Bit Set, 21 Pc. Titanium Nitride Coated Pilot Point DEWALT Bit Set with Case for Wood, Metal and Plastic (DW1361)
Titanium Nitride Coating Pilot Point for Longer Life
As an affiliate, we earn on qualifying purchases.
As an affiliate, we earn on qualifying purchases.
Use the Correct Drill Bits for Your Material
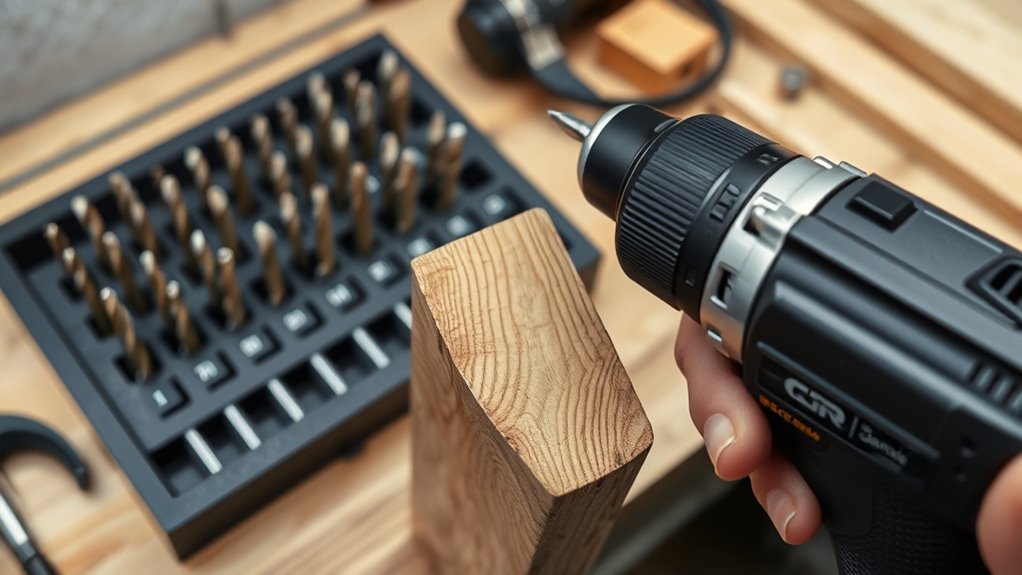
Choosing the right drill bits is essential because using the wrong ones can damage your material or make your work harder. Knowing about drill bit types helps you select the best tool for each job. For example, high-speed steel bits work well with metal, while carbide-tipped bits excel on tough materials like tile or concrete. Wood requires twist drill bits with a pointed tip, designed for clean holes. Always check the material compatibility before starting; using a bit designed for wood on metal can cause breakage or poor results. Selecting the appropriate drill bit type guarantees clean, precise holes and minimizes damage. Additionally, understanding power tool specifications can help you make informed decisions about compatibility and performance, ensuring your projects go smoothly. Properly bit selection also extends the lifespan of your tools and improves overall safety during operation. Being aware of the material hardness helps in choosing the most effective bit for your specific application, reducing wear and tear on your equipment. Taking the time to match drill bits to your material saves you effort and prevents costly mistakes, making your work smoother and more efficient.
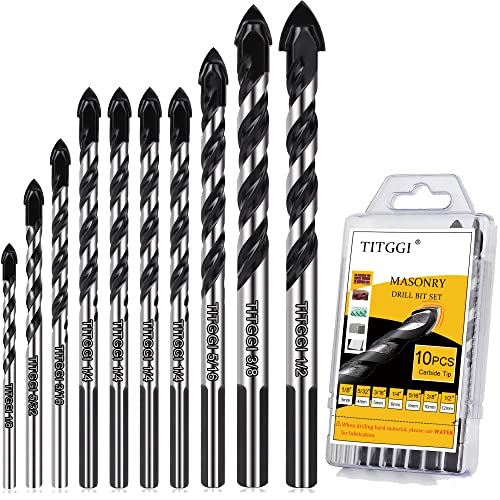
10-PCS Masonry Drill Bit Set & Concrete Drill Bit Set, Professional Drill Bit Set for Glass/Brick/Plastic/Cement/Wood/Tile/Etc, Industrial Strength Carbide Drill Bit Tip, 1/8"-1/2" by TITGGI
HIGH QUALITY DRILL BIT SET; TITGGI Masonry drill bit set, industrial strength carbide drill bit tip, excellent abrasion…
As an affiliate, we earn on qualifying purchases.
As an affiliate, we earn on qualifying purchases.
Keep Your Tools Sharp and Well-Maintained
You need to keep your tools in top shape to get the best results. Regularly inspecting them, storing them properly, and sticking to a routine sharpening schedule guarantees they stay sharp and reliable. Taking these steps prevents damage and keeps your projects on track. Additionally, ensuring your tools are free from infection risks helps maintain their integrity and safety during use. Incorporating Proper Tool Maintenance techniques can also help prevent corrosion and prolong the lifespan of your tools. Being aware of potential auditory processing challenges can further support the effectiveness of your tool care routine. Emphasizing clear and precise voiceover scripts can enhance communication and effectiveness in instructional content.
Regularly Inspect Tools
Regularly inspecting your tools is essential to guarantee they perform safely and effectively. Check for signs of wear, corrosion, or damage that could compromise tool ergonomics and increase the risk of accidents. A well-maintained tool ensures proper grip and control, preventing slips that could cause injury or skull chips. Always verify that safety equipment, like gloves and eye protection, remains in good condition and fits correctly. Tighten loose parts and replace worn-out blades or bits promptly. By maintaining your tools regularly, you reduce the likelihood of unexpected failures and improve your chipping accuracy. Proper contrast ratio also plays a role in ensuring your tools function correctly in various lighting conditions. Ensuring your workspace has adequate visual clarity can help you spot issues early and avoid mishaps. Remember, a little routine inspection goes a long way in keeping your workspace safe and your tools operating at peak performance. Staying aware of tool maintenance can help you identify potential problems before they lead to accidents. Incorporating regular equipment checks can further enhance safety and efficiency in your work. Additionally, understanding the impact of astrological traits might help you maintain a focused and positive mindset during your work. Stay vigilant, and never skip this crucial step.
Proper Storage Techniques
Proper storage techniques are key to keeping your tools sharp and in top condition. Effective storage organization ensures each tool is easily accessible and protected from damage. Use designated racks, drawers, or cases to prevent clutter and accidental impacts. Climate control is equally important; store tools in a cool, dry environment to prevent rust and corrosion. Avoid places with high humidity or temperature fluctuations, which can degrade blade edges and overall tool integrity. Regularly clean and dry tools before storing, and consider using silica gel packs or rust inhibitors for added protection. Additionally, understanding storage best practices can help extend the lifespan of your tools and maintain their cutting performance, keeping your chipping game sharp and reliable. Incorporating sound vibrations into your maintenance routine can also promote micro-level healing of metal surfaces, further enhancing tool longevity. Maintaining proper air circulation around stored tools can also reduce moisture buildup and prevent corrosion, ensuring your tools stay in optimal condition for longer periods.
Routine Sharpening Schedule
Maintaining a consistent sharpening schedule is essential to guarantee your tools perform at their best. Regularly sharpening your drill bits prevents dullness and ensures clean cuts. The material of your drill bits, whether high-speed steel, cobalt, or carbide, influences how often you need to sharpen. For example, carbide bits stay sharp longer but require specific sharpening techniques. Use the right sharpening methods—such as a grinding wheel or sharpening stone—to restore the cutting edge effectively. Regular maintenance keeps your drill bits in excellent condition, reduces stress on your tools, and prolongs their lifespan. Staying informed about the latest artistic innovations can also inspire better tool care and application techniques. Stick to a routine, inspecting and sharpening your bits frequently, especially after heavy use. Being aware of your electric bike horsepower can help you better understand the power capabilities of your tools and equipment, ensuring optimal performance. This way, you’ll always be ready for precise, efficient chipping without risking damage or accidents.

Drill Doctor DD750X Electric Drill Bit Sharpener, 3/32-3/4" High-Speed, Portable – Steel, Masonry, Carbide, Cobalt, Tin-Coated Bits, Adjustable Angles
SHARPENS STANDARD DRILL BITS: The DD750X drill bit sharpener sharpens twist bits from 3/32" to 3/4". This professional…
As an affiliate, we earn on qualifying purchases.
As an affiliate, we earn on qualifying purchases.
Apply Steady, Controlled Pressure

Applying steady, controlled pressure is crucial when chipping because it helps prevent further damage to the glass while guiding the tool accurately. When selecting a drill bit, choose one designed for glass or delicate materials to ensure smooth, controlled cuts. Proper tool maintenance is essential—keep your drill bits sharp and clean, so they cut without requiring excessive force. As you work, apply consistent pressure without forcing the tool, which can cause cracks or skews. This steady approach allows the bit to penetrate evenly, reducing stress on the glass. Remember, rushing or pressing too hard risks ruining your work. Focus on gentle, controlled pressure, adjusting as needed to maintain precision. Using the right oil for your tools also helps ensure smooth operation and reduces the risk of overheating or wear. Additionally, understanding navigation and mapping techniques can help you plan the most efficient and safe approach to your project. Developing a good technique for applying pressure is essential for clean, skull-free chipping every time. Incorporating connected tools and digital guides can further enhance your control and accuracy during the process.

Mudder 57pcs Micro Drill Bits & Pin Vise Set, 46 Pcs Hand Twist Drills and 10 Pcs PCB Mini Cutting Bits for Resin, Beads, Polymer Clay, Craft, DIY Jewelry, Model Making Projects(Black)
What you receive: this hand drill bits set includes 1 piece of pin vise hand drill, 46 pieces…
As an affiliate, we earn on qualifying purchases.
As an affiliate, we earn on qualifying purchases.
Match Drill Speed to the Material

To get the best results, you need to match your drill speed to the material’s properties. Consider its density and hardness, then modify your speed accordingly. Using the proper cutting speeds ensures clean cuts and prolongs your drill’s life. Additionally, understanding the impact of cookies on your browsing experience can help you customize your settings for optimal performance. Being aware of the net worth of professionals like Doug Christie can also inspire confidence in managing your tools and investments wisely.
Match Speed to Density
Matching your drill speed to the material’s density is crucial for effective chipping. When you do, you optimize chip removal techniques and prevent damage. Softer materials require slower speeds, while denser ones demand faster rotation for efficient cutting. Using the right drill bit materials ensures compatibility with your material’s density, reducing wear and tear. Adjusting speed helps avoid overheating and minimizes the risk of skull chips. Keep these points in mind:
- Match drill speed with the material’s density for clean cuts
- Choose drill bit materials suited for your project
- Use proper chip removal techniques to prevent clogging
- Don’t rush; slower speeds improve control
- Experiment with speed settings for different densities
Adjust for Material Hardness
Since softer and harder materials respond differently to cutting, adjusting your drill speed according to the material’s hardness is essential. Proper material selection is the first step; choosing the right drill speed depends on understanding the hardness of your workpiece. Conduct hardness testing when necessary to determine how tough the material is, ensuring you don’t apply too much force or too little. Harder materials require slower drill speeds to prevent overheating and excessive wear, while softer materials can handle higher speeds for cleaner cuts. Matching your drill speed to the material’s hardness minimizes chipping and maximizes precision. By tailoring your approach based on hardness testing and material selection, you’ll improve your results and avoid costly mistakes. Adjusting for hardness is a critical step in chipping mastery.
Use Proper Cutting Speeds
Choosing the right cutting speed for your drill is essential to achieve clean cuts and prevent damage to the material. Matching the cutting speed to the material ensures maximum efficiency and tool life. When setting your speed, consider the material’s hardness and the appropriate feed rate to avoid overheating or dulling your bit. A faster cutting speed isn’t always better; it can cause excessive heat and poor finishes. Adjust your drill’s speed based on these factors for the best results. Remember, a proper balance enhances precision and extends tool longevity.
- Use higher cutting speeds for softer materials like wood
- Lower cutting speeds for harder metals
- Match feed rate to cutting speed for smooth operation
- Avoid excessive speed to prevent chip skulls
- Regularly adjust based on material hardness and drill performance
Secure Your Workpiece Properly

To guarantee safe and accurate chipping, you must secure your workpiece properly before starting. Using effective clamping techniques ensures workpiece stability, preventing movement that could lead to mistakes or accidents. A secure hold keeps your material steady, allowing you to focus on precise cuts. Consider the type of clamp and placement to maximize stability. The table below highlights common clamping methods:
| Clamping Technique | Suitable Material | Best for Stability |
|---|---|---|
| C-clamps | Thick, small pieces | Moderate |
| F-clamps | Large or awkward shapes | High |
| Quick-release clamps | Repetitive tasks | Convenience |
| Vise | Flat, square workpieces | Very secure |
Choose the right method to maintain control and safety during chipping.
Start With a Pilot Hole When Necessary
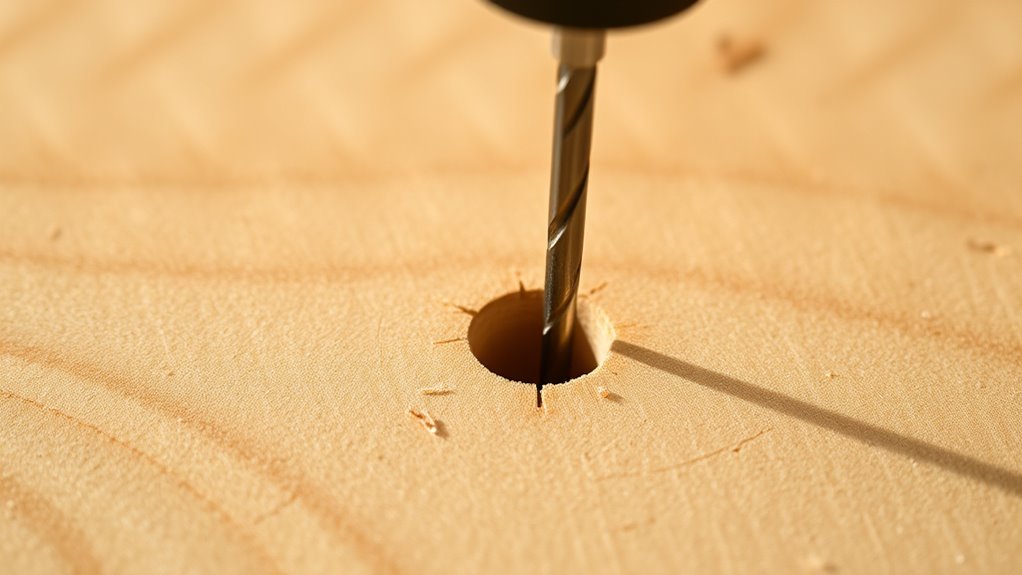
Starting with a pilot hole is often essential to guarantee accurate and clean drilling, especially on harder or delicate materials. A properly placed pilot hole acts as a guide for your drill starter, reducing the risk of slipping or causing unwanted cracks. It also helps prevent unnecessary stress on the drill bit and workpiece. When you drill a pilot hole, you ensure better control and precision, making the process smoother. Keep these points in mind:
- Use a pilot hole for tight or intricate spaces
- Choose the right drill bit size for your pilot hole
- Avoid overloading your drill to prevent bit wandering
- Always start slow to maintain accuracy
- Remove debris regularly for a cleaner hole
Starting with a pilot hole ultimately safeguards your material and improves your overall craftsmanship.
Use Proper Cooling and Lubrication Techniques

Proper cooling methods keep your tools from overheating and extend their lifespan. Using the right lubrication guarantees smooth operation and reduces friction. Mastering these techniques improves your chipping results and prevents costly mistakes.
Proper Cooling Methods
Effective cooling and lubrication are essential for maintaining ideal chipping performance and preventing tool damage. Using the right cooling liquids helps dissipate heat efficiently, ensuring your tools stay cool during heavy cutting. Proper heat dissipation minimizes thermal stress, reducing the risk of warping or cracking. To optimize cooling methods, consider these key points:
- Choose the appropriate cooling liquids for your material and tool type
- Constantly monitor temperature to prevent overheating
- Apply cooling fluids directly to the cutting zone for maximum effectiveness
- Avoid air cooling, which can lead to uneven heat dissipation
- Maintain a clean work environment to prevent debris buildup that hampers cooling
Mastering proper cooling methods ensures smoother cuts, longer tool life, and consistent results.
Lubrication Best Practices
While cooling methods help manage heat during cutting, applying the right lubrication techniques further enhances tool performance and lifespan. Proper lubrication reduces friction, prevents tool wear, and guarantees safer drilling safety by minimizing sparks and overheating. Use appropriate lubrication types based on your material and cutting conditions; for example, cutting oils for metal or water-based lubricants for softer materials. Always keep lubrication consistent, especially during prolonged operations, to prevent chip sticking and overheating. Proper application techniques include direct spraying or steady flow to the cutting zone. Remember, good lubrication not only improves efficiency but also reduces the risk of tool failure. Following these best practices ensures safer, cleaner cuts and extends your tools’ life, making every drilling operation smoother and more reliable.
Avoid Overloading the Drill or Tool

Overloading a drill or tool can lead to equipment damage, safety hazards, and poor chip quality. When you push too hard, you risk causing a drill overload, which stresses the motor and accelerates tool burnout. To prevent this, pay attention to your tool’s limits and avoid forcing it through tough material.
Remember:
- Use the correct drill bit size for the task
- Let the tool work at its own pace
- Don’t force the tool if it stalls
- Adjust feed pressure accordingly
- Monitor for signs of overheating or strain
Practice on Scrap Material Beforehand

Practicing on scrap material before working on your actual piece helps you get a feel for how the tool reacts and how much pressure to apply. Use a test surface, preferably scrap material, to simulate the actual workpiece. This allows you to observe how the chip responds and adjust your technique accordingly. By practicing first, you reduce the risk of damaging the final project with unintended chips or cracks. Focus on maintaining steady pressure and controlling your angle. This trial run helps you identify any issues with your grip or tool handling. Remember, the goal is to develop a smooth, controlled motion. Taking time to test on scrap material assures you’re confident when chipping the real surface, leading to cleaner, safer results.
Pay Attention to Drill Alignment and Angle

Ensuring your drill is properly aligned and held at the correct angle is essential for clean, precise chips. Proper drill alignment prevents wandering and uneven cuts, while maintaining the correct drill angle guarantees efficient material removal without damaging your workpiece. Always double-check your setup before drilling. Pay close attention to the drill angle to avoid creating rough edges or burns. Misaligned drills can cause skipped chips or unwanted splinters. To improve your technique:
- Verify the drill alignment against the workpiece surface
- Set the correct drill angle before starting
- Use a guide or jig for consistent positioning
- Keep the drill steady and perpendicular when needed
- Adjust your grip to maintain control and stability
Mastering drill alignment and angle leads to smoother, cleaner chips—and better results.
Frequently Asked Questions
How Do I Identify the Best Drill Bit for My Specific Material?
To identify the best drill bit for your material, start by considering your bit selection based on material compatibility. Check the drill bit’s specifications for compatibility with wood, metal, masonry, or plastic. Look for high-quality bits designed specifically for your material type, making certain they can handle the hardness or density. This guarantees cleaner, safer drilling and prevents damage, making your project more efficient and professional.
What Are the Signs That My Drill Bits Need Sharpening or Replacement?
Did you know that over 60% of drill bit failures are due to unnoticed bit degradation? If your drilling becomes slower, produces rough or uneven holes, or the bit’s edges look dull or chipped, it’s time for sharpening indicators or replacement. You’ll also notice increased effort and overheating. Regularly inspecting your bits helps prevent damage, ensuring smoother drilling and extending their lifespan. Don’t ignore these signs to avoid costly mistakes.
How Can I Tell if My Drill Speed Is Appropriate for the Material?
You can tell if your drill speed is right by observing the material compatibility and how the drill performs. If the drill moves smoothly without burning or melting the material, your speed is appropriate. For tougher materials, lower speeds work best, while softer materials often need higher speeds. Listen for any burning smell or chipping, and adjust the drill speed accordingly to make certain of clean cuts and prevent damage.
What Safety Precautions Should I Take When Drilling Fragile or Delicate Materials?
Think of your safety gear as a shield protecting a delicate treasure. Always wear protective gear like goggles and gloves when drilling fragile materials. Clear your work area of clutter and distractions, creating a safe harbor for your tools and hands. Use gentle, controlled pressure to avoid cracking the material, and work slowly. These precautions guarantee your safety and preserve the integrity of the delicate material you’re handling.
How Do I Properly Set up and Secure a Workpiece for Precise Drilling?
To properly set up your workpiece for precise drilling, first guarantee secure workpiece clamping to prevent movement. Use a vise or clamps that hold the material firmly without causing damage. Next, check drill alignment carefully, making sure the drill bit is perpendicular to the surface. Double-check your setup before drilling, and make adjustments as needed. Proper workpiece clamping and drill alignment are key to accuracy and safety.
Conclusion
Mastering these chipping commandments keeps your projects smooth and flawless. When you follow these tips, you’ll avoid costly mistakes and achieve clean, precise cuts every time. Think about it — aren’t your projects worth the effort to chip away at perfection? With the right tools, techniques, and focus, you can turn rough material into a masterpiece. So, why settle for a skull when you can craft a true work of art?