
To capture picture-perfect golf vacation photos, focus on composing your shots using the rule of thirds and leading lines to guide viewers’ eyes. Use golden hour lighting for warm tones or overcast days for even illumination. Freeze action with fast shutter speeds and be ready for prime moments. Include natural landscapes and unique perspectives for standout images. Experiment with angles and foreground elements to add depth. Continue exploring these tips to elevate your golf photography skills even further.
Key Takeaways
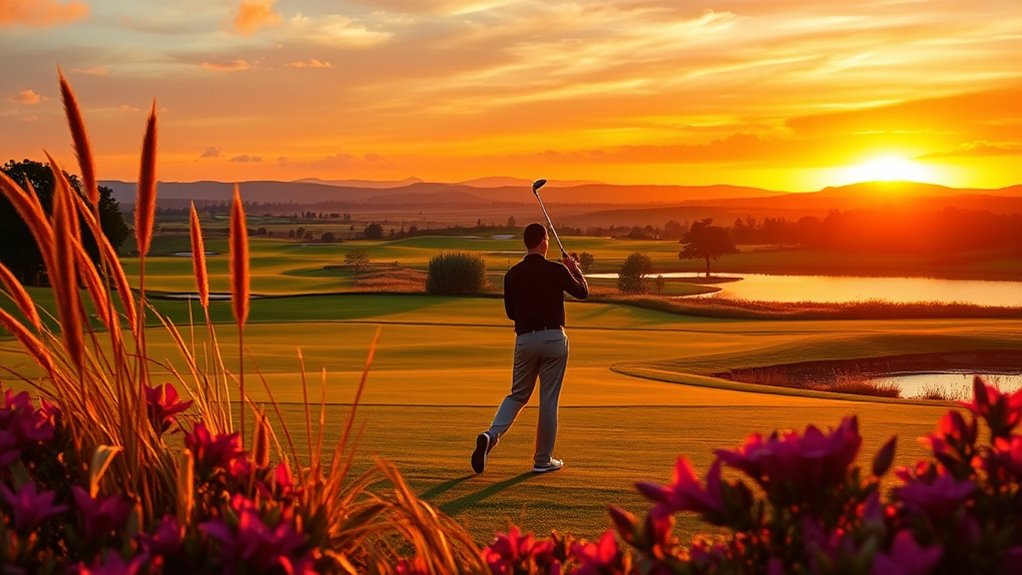
- Capture during golden hour for warm, rich tones and optimal natural lighting.
- Use leading lines and the rule of thirds to create balanced, engaging compositions.
- Experiment with different angles and perspectives, including bird’s-eye views and low shots.
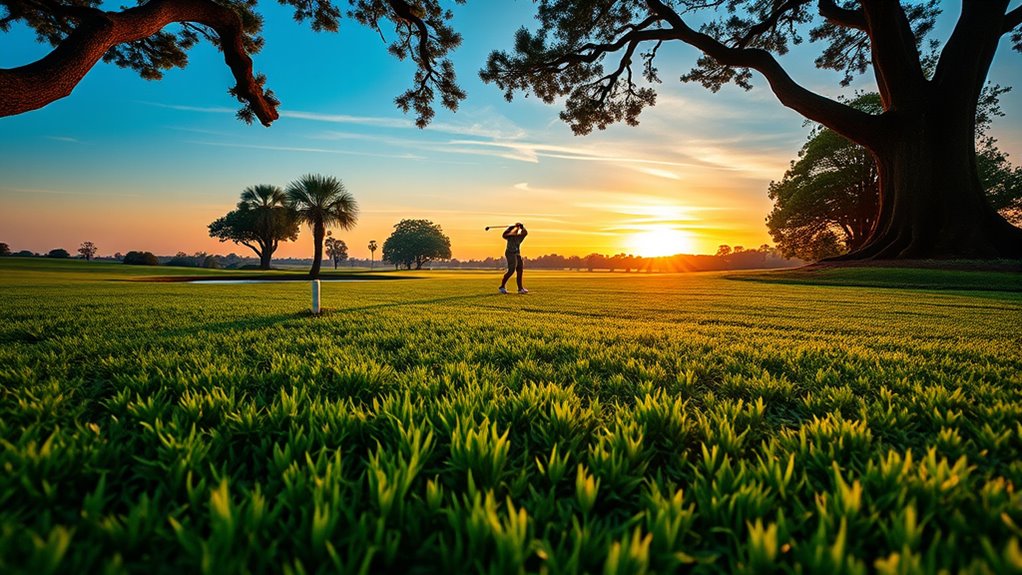
- Incorporate foreground elements like grass or flowers to frame scenes and add depth.
- Utilize action settings, such as high shutter speeds and continuous autofocus, to freeze motion and capture dynamic golf moments.

SVPRO USB Camera 1080P 120fps High Speed Camera for Golf Swing Simulator,12MP 4K Webcam with 3X Manual Zoom Lens USB Plug and Play for Computer Laptop Compatible with Windows Linux MacOS Android
High Speed: With this high-speed UVC camera, you can enjoy programmable frame rates, with the potential to reach…
As an affiliate, we earn on qualifying purchases.
As an affiliate, we earn on qualifying purchases.
Master the Art of Composition

To capture stunning golf vacation photos, mastering the art of composition is essential. Use the rule of thirds to create balanced and engaging images; imagine dividing your frame into nine equal parts and placing key elements along these lines or at their intersections. This technique guides the viewer’s eye naturally toward the main subject. Additionally, incorporate leading lines such as cart paths, bunkers, or rows of trees to draw attention directly to your focal point. These lines add depth and perspective, making your photos more dynamic. Keep your shot simple and avoid clutter, ensuring your subject stands out. Paying attention to projector specifications can help you better understand how your equipment influences image quality. Moreover, understanding European cloud infrastructure can assist you in choosing the right digital tools for editing and sharing your photos. Considering lighting conditions is also crucial, as natural light can significantly enhance or diminish your photo’s quality. Being aware of sound techniques in speech therapy can also inspire creative ways to capture the atmosphere of your golf outings through audio or video. Additionally, being familiar with user privacy and cookies can help you safeguard your digital content and personal data during your photography sessions. By intentionally framing your shots with these composition techniques, you’ll produce striking images that truly capture the essence of your golf vacation.

Canon Cameras US Point and Shoot Digital Camera with 3.0" LCD, Silver (2956C001)
Powerful 40x Optical Zoom with Optical Image Stabilizer and Zoom Framing Assist
As an affiliate, we earn on qualifying purchases.
As an affiliate, we earn on qualifying purchases.
Utilize Natural Lighting to Your Advantage
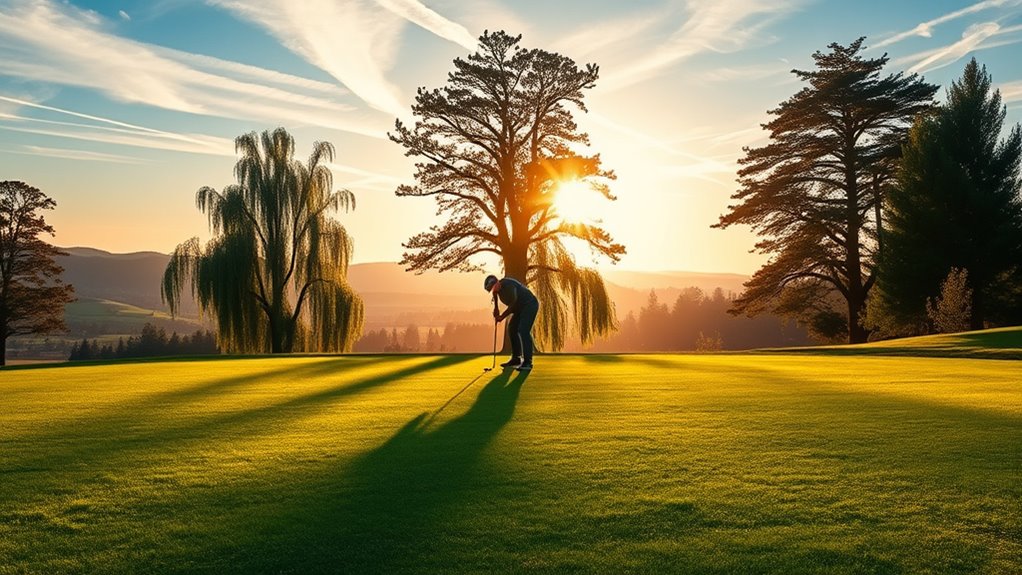
Harnessing natural light is essential for capturing vibrant and well-exposed golf vacation photos. The best time to photograph is during the golden hour, shortly after sunrise or before sunset, when sunlight creates warm, rich tones that add depth and mood to your shots. During this time, the light is softer and more diffused, reducing harsh shadows and glare, which helps highlight details like the texture of the course or your swing. Take advantage of diffused light on overcast days, as it evenly illuminates your scene without intense contrasts. Position yourself so the sun is behind or to the side of your subject, avoiding direct sunlight that can cause overexposure. Detecting passive voice can also improve the clarity of your descriptions and instructions. By utilizing these natural lighting conditions, you’ll capture more vibrant, balanced photos that truly showcase your golf vacation. Additionally, understanding how to optimize your camera settings for different lighting scenarios will further enhance your photos’ quality. To get the most out of your shots, consider experimenting with white balance adjustments to accurately reflect the scene’s colors in varying light conditions. Incorporating natural lighting principles can help you craft more compelling and beautifully lit images. Being mindful of lighting direction can make a significant difference in how your subject appears in the final photo.

Camera Lens Filter 77mm Midas Touch Liquid Golden Glow Effect for Photography and Video Dreamy Warm Light Diffusion Glass for Portraits Weddings and Cinematic Shoots
Golden glow light effect: The Midas Touch camera lens filter transforms light into a warm liquid golden glow…
As an affiliate, we earn on qualifying purchases.
As an affiliate, we earn on qualifying purchases.
Capture Action Shots With Precision

Capturing sharp, dynamic action shots on the golf course requires you to anticipate movement and use the right camera settings. To freeze fast swings and ball trajectories, set a high shutter speed—around 1/1000 sec or faster. This minimizes motion blur and keeps your images crisp. Use continuous autofocus (AI Servo or AF-C mode) to track moving subjects, ensuring focus stays sharp as players swing or run. Keep a steady hand or use a tripod if possible, especially in low light. Timing is essential; anticipate the moment just before or during the swing for the best shot. Cultivating a calm mindset can help you stay patient and focused during fast-paced action. Additionally, understanding player positioning can help you anticipate where the action will happen next. Being familiar with the camera’s autofocus modes can further enhance your ability to capture fleeting moments. Paying attention to lighting conditions can also significantly improve image quality, especially during dawn or dusk. Incorporating knowledge of restorative techniques such as proper camera settings can help you adapt to different conditions and improve your shots. With the right shutter speed and autofocus, you’ll be able to capture those exciting, in-the-moment shots that truly showcase the action on the course.

Wide-Angle Photography: Capturing Landscape, Portrait, Street, and Architectural Photographs with Wide-Angle Lenses (Including Tilt-Shift Lenses)
As an affiliate, we earn on qualifying purchases.
As an affiliate, we earn on qualifying purchases.
Include the Landscape to Showcase the Course

Including landmarks or historical features can also tell the story of the course’s rich history. Think about framing shots that showcase the terrain’s texture and color variations, adding depth to your photos. This approach not only highlights the course’s visual appeal but also connects viewers to its natural environment and history. Additionally, utilizing study techniques and exam preparation strategies can help you plan your shots more effectively, ensuring you capture the perfect scene at the right moment. Recognizing zodiac traits and personalities can also inspire creative angles that reflect the course’s character. For example, understanding lighting conditions can guide you to choose the best time of day for optimal natural illumination. Remember, well-placed landscape shots make your photos more compelling and give viewers a sense of place. Incorporating visual storytelling techniques can further enhance your images by creating a narrative that resonates with viewers. Exploring best photography gear can also improve your ability to capture sharp, vibrant images in various lighting conditions.
Experiment With Perspectives and Angles
To make your golf vacation photos stand out, try exploring unusual viewpoints and angles. Incorporate foreground elements to add depth and interest, and don’t hesitate to capture bird’s-eye shots for a fresh perspective. These techniques will help your images become more dynamic and engaging. Additionally, experimenting with originality by using everyday materials creatively can inspire unique photographic compositions that showcase your personal style. For example, using photography techniques such as framing and lighting can further enhance your images and highlight your creativity. Remember to consider wall decor options to display your best shots at home, creating a personalized gallery that celebrates your travel adventures. Incorporating visual storytelling elements can also elevate your photos by conveying the story behind each shot, making your collection more memorable. Paying attention to color coordination can also add harmony and appeal to your compositions.
Try Unusual Viewpoints
Experimenting with unusual viewpoints can make your golf vacation photos stand out and add a fresh perspective to familiar scenes. By trying different angles, you capture unique images that tell a story. Use drone perspectives to showcase the course from above, revealing patterns and landscapes you wouldn’t see from the ground. Reflection shots, like capturing the ball in a puddle or a pond, add artistic flair and depth. Get low to the ground for dramatic shots of the golfer or the course’s texture. Play with perspective by shooting from behind trees or through branches to frame your shot creatively. These techniques make your photos more engaging and memorable, giving viewers a new way to experience your golf adventure. Be mindful of safe installation practices in your descriptions to ensure your photography setup and equipment are used securely and effectively. Embracing photography safety helps prevent accidents and preserves the integrity of your equipment, making your photography sessions more enjoyable.
Use Foreground Elements
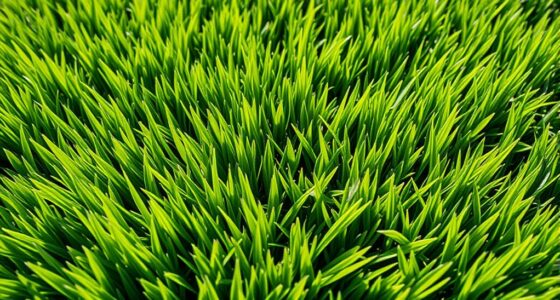
Using foreground elements can dramatically enhance your golf vacation photos by adding depth and dimension. Incorporate foreground focus to draw viewers’ attention and make your shots more engaging. Look for natural elements like leaves, flowers, or textured grass to frame your scene, creating a sense of element framing that guides the viewer’s eye toward the main subject. Experiment with low angles to include interesting foreground details that elevate the overall composition. By doing so, you’ll create a layered effect that adds visual interest and context. Remember, the foreground isn’t just a background — it’s a essential part of storytelling. Use it intentionally to highlight your subject while adding a dynamic perspective that makes your photos stand out.
Capture Bird’s-Eye Shots
Capturing bird’s-eye shots can dramatically transform your golf vacation photos by offering a fresh perspective that highlights the layout and scale of the course. Using a drone or aerial camera, you can showcase the entire landscape from above, making your photos stand out. Before flying, check drone regulations to guarantee you’re compliant and avoid fines. Experiment with aerial camera settings—adjust ISO, shutter speed, and aperture to get sharp, well-exposed shots. Keep these tips in mind:
- Use a wide-angle lens to capture more of the course
- Try different heights and angles to find the most dramatic view
- Fly during ideal weather conditions for clear, vibrant images
- Keep safety and regulations in mind while capturing your shots
These techniques will help you create stunning, unique golf course photos.
Edit Your Photos for a Professional Finish

To give your golf vacation photos a polished, professional look, editing is essential. Focus on color correction to enhance vibrancy and ensure your photos reflect true colors. Additionally, use photo cropping to eliminate distractions and improve composition, drawing attention to the main subject. Proper editing can turn good shots into stunning images. Here’s a quick guide:
| Editing Tip | Purpose |
|---|---|
| Color correction | Brightens dull images, corrects color flaws |
| Photo cropping | Frames the shot better, removes unwanted elements |
| Adjust brightness | Adds clarity and balance to the image |
| Enhance contrast | Creates depth and makes details pop |
| Sharpening | Improves overall sharpness and focus |
Mastering these techniques guarantees your photos look professional and memorable.
Frequently Asked Questions
What Camera Equipment Is Best for Golf Vacation Photography?
For golf vacation photography, you should bring a versatile camera with good zoom capabilities, like a mirrorless or DSLR. Pack essential accessories such as a telephoto lens for capturing distant shots and a wide-angle lens for scenic views. Don’t forget spare batteries, memory cards, and a lens cleaning kit. These gear choices help you capture sharp, vibrant images of the course, players, and beautiful landscapes, making your photos truly memorable.
How Can I Take Clear Photos in Low-Light Conditions?
To take clear photos in low-light conditions, focus on night photography techniques. Use a tripod to guarantee stability and prevent camera shake, which is vital in low light. Adjust your camera’s ISO settings carefully—higher ISO can brighten images but may introduce noise. Use a slower shutter speed to let in more light, but keep the tripod steady. These steps help you capture sharp, well-exposed photos even in dim lighting.
What Are Some Tips for Photographing Golfers in Motion?
Photographing golfers in motion is like capturing lightning—fast and fleeting. You should use panning techniques, following the golfer’s movement smoothly. Set your shutter speed to around 1/500 or faster to freeze the action, or slower for a motion blur effect. Practice steady hand movements, and keep your focus on the golfer’s swing. This approach guarantees sharp, dynamic images that truly showcase the sport’s energy and movement.
How Do I Prevent Lens Flare in Outdoor Golf Photos?
To prevent lens flare in outdoor golf photos, you should use lens hood or shade your lens from direct sunlight. Additionally, avoid shooting with the sun directly behind your subject, and consider changing your angle to block unwanted light. Using lens flare control techniques like adjusting your position or adding a lens filter can also help. These tips guarantee your outdoor photography stays clear and sharp, capturing the best golf vacation moments.
Which Editing Tools Are Most Effective for Enhancing Golf Images?
Think of editing tools as a golfer’s secret weapon—turning good shots into great ones. Photo filter apps are your trusty clubs, adding mood and style, while color correction tools fine-tune every hue for true-to-life brilliance. Use these tools to sharpen details, balance exposure, and enhance greens. With a few clicks, you transform raw images into mesmerizing stories, making your golf vacation photos as memorable as the game itself.
Conclusion
By applying these tips, you’ll elevate your golf vacation photos from simple snapshots to stunning keepsakes. Imagine capturing a perfect swing against a breathtaking sunset, just like a pro photographer would. For example, a golfer who experimented with different angles and natural lighting ended up with a memorable shot that became the highlight of their trip. Keep practicing, stay creative, and your photos will tell the story of your golf adventures long after the trip ends.