
To soundproof a room quickly, start by clearing the space and measuring your walls accurately. Attach sound-absorbing panels or foam tiles using suitable adhesives, ensuring a snug fit without gaps. Seal cracks around doors and windows with weatherstripping or acoustic caulk for airtightness. Adding layers like rugs or curtains can boost noise reduction. Follow these simple steps, and you’ll create a quieter space—keep going to discover more effective tips and tricks.
Key Takeaways
- Hang heavy, thick curtains or wall tapestries to absorb sound quickly and easily.
- Use removable foam panels or acoustic tiles on walls for immediate soundproofing.
- Seal gaps around windows and doors with weatherstripping or draft stoppers to prevent sound leaks.
- Place rugs and soft furnishings strategically to dampen echoes and noise reflections.
- Rearrange furniture to block sound pathways and create sound-absorbing zones efficiently.

Zensouds Golf Net, 10x7FT with Golf Practice Mat, Hitting Aid Nets for Backyard Driving Chipping Training Swing with Targets Outdoor or Indoor– Gifts for Men/Dad/Him
【Multiple Target Golf Net- Golf Simulators for Home 】Our 10*7ft golf hitting net features a central bullseye target...
As an affiliate, we earn on qualifying purchases.
Gathering Your Materials
Before you begin your DIY room soundproofing project, you need to gather all the necessary materials. Start by selecting decorative accents like rugs, curtains, and wall hangings, which can help absorb sound and improve aesthetics. Consider soft furnishings and furniture arrangement options that naturally reduce echo, such as plush sofas or bookcases filled with books. You’ll also need soundproofing materials like acoustic panels, weatherstripping, or foam. Keep in mind that strategic furniture placement can complement these materials, creating a more effective sound barrier. Additionally, incorporating natural pool design elements can contribute to a tranquil environment that enhances your overall space. Being aware of auditory sensitivities can help guide your choices in creating a comfortable acoustic environment. Gathering everything beforehand assures you won’t interrupt your project halfway through. Having your decorative accents and furniture set up thoughtfully will make the process smoother and help you achieve a quiet, cozy space with minimal effort. A well-organized upkeep plan can also ensure your soundproofing remains effective over time.

Callaway Swing Easy Golf Swing Trainer Aid, Orange
Golf Training Aid: Our golf swing aid reinforces the key fundamentals of a good golf swing
As an affiliate, we earn on qualifying purchases.
Preparing the Space
To effectively prepare your space for soundproofing, start by clearing the room of all unnecessary items and clutter. A tidy space makes it easier to focus on your decorating ideas and optimize your room layout for soundproofing. Rearrange furniture to minimize open areas where sound can bounce around. Use the table below for quick tips:
| Decorating Ideas | Room Layout Strategies |
|---|---|
| Hang fabric wall art for softness | Position large furniture against walls |
| Add rugs and curtains to absorb sound | Create zones to contain noise |
| Use bookcases as sound barriers | Keep electronic devices away from walls |
| Opt for upholstered furniture | Avoid clutter that blocks sound paths |
| Incorporate soft lighting for ambiance | Maximize wall space for soundproofing materials |
Additionally, integrating smart home technology like sound sensors and automated soundproofing devices can enhance your room’s acoustics more effectively. Using soundproofing materials in your walls and ceilings can also significantly improve sound absorption. Incorporating acoustic treatments such as panels or diffusers can further optimize your room’s sound quality. Moreover, selecting appropriate soundproofing techniques based on your specific needs can result in more effective noise reduction.
Garmin Approach R10, Portable Golf Launch Monitor, Take Your Game Home, Indoors or to The Driving Range, Up to 10 Hours Battery Life - 010-02356-00
Work to improve your game at home, indoors or on the driving range with a portable launch monitor...
As an affiliate, we earn on qualifying purchases.
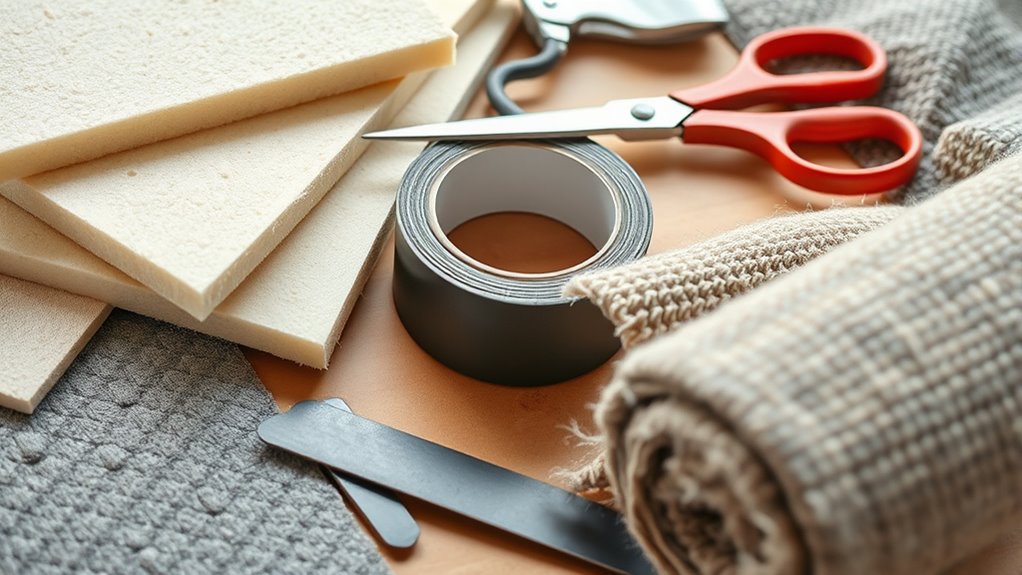
Measuring and Cutting the Soundproofing Material

To guarantee your soundproofing material fits perfectly, you need to select the right type for your space and goals. Accurate measurements are essential, so use a tape measure and double-check your dimensions before cutting. When it’s time to cut, follow precise techniques to avoid mistakes and waste. Incorporating energy-efficient materials can also enhance sustainability and performance in your soundproofing project. Understanding building codes and standards can help ensure your setup complies with safety requirements and best practices. Additionally, considering ventilation considerations can improve overall comfort and effectiveness of your soundproofing efforts. Properly insulating your space can further optimize noise reduction and energy efficiency.
Selecting the Right Material
Choosing the right soundproofing material starts with accurate measurements of your space. You need to take into account the acoustic properties of different options—such as how well they absorb or block sound—and how durable the material is for long-term use. For example, dense materials like mass-loaded vinyl or thick foam panels provide better sound insulation, but they must fit properly to be effective. Measure carefully to ensure you select enough material without excessive waste. Durability matters because you want your soundproofing to last without tearing or degrading over time. Think about the environment—humid areas may require moisture-resistant options. By understanding these factors, you’ll be able to choose the most suitable material that balances acoustic performance with longevity, ensuring a quieter, more comfortable room.
Accurate Measurement Techniques
Once you’ve selected your soundproofing material, precise measurement and cutting are key to maximizing its effectiveness. Measure each wall carefully, accounting for outlets, switches, and decorative accents that might affect placement. Use a tape measure and a straight edge to mark clean, accurate lines on the material, ensuring a snug fit. Avoid rushing this step, as uneven cuts can create gaps that compromise soundproofing. Keep aesthetic considerations in mind—if the material will be visible, plan for neat cuts that align with existing decor or can be concealed easily. Double-check your measurements before cutting to prevent waste. Accurate measurement techniques help you achieve a seamless, professional look while optimizing soundproofing performance, making your DIY effort both effective and visually appealing. Proper measurement is especially important when working with dense, high‑performance soundproofing materials to ensure maximum effectiveness.
Precise Cutting Methods
Accurate measurement and careful cutting are essential for guaranteeing your soundproofing material fits snugly and performs effectively. Avoid falling for common soundproofing myths that suggest any material works equally well; instead, focus on precise cuts guided by acoustic engineering principles. Use a sharp utility knife and a straightedge to make clean, straight lines. Measure twice before cutting to prevent mistakes, especially when working with large sheets. Properly fitted materials minimize gaps where sound can escape, maximizing your DIY efforts. Remember, rough cuts or imprecise measurements can compromise your soundproofing. By paying close attention to detail during this step, you’ll ensure your soundproofing material functions as intended, delivering better results and a quieter space. Surface fitting techniques are also crucial for optimizing soundproofing performance. Additionally, understanding material properties can help you choose the best options for your specific needs. Taking the time to measure accurately ensures a seamless and effective installation, saving you time and effort in the long run.

Chriiena Golf Putting Green, Practice Putting Green Mat, Large Professional Golfing Training Mat for Indoor Outdoor (Putting green-5X10ft)
★Real Golfing Feel: Made of premium grass and weaved with most scientific grass density, Chriiena golf putting green...
As an affiliate, we earn on qualifying purchases.
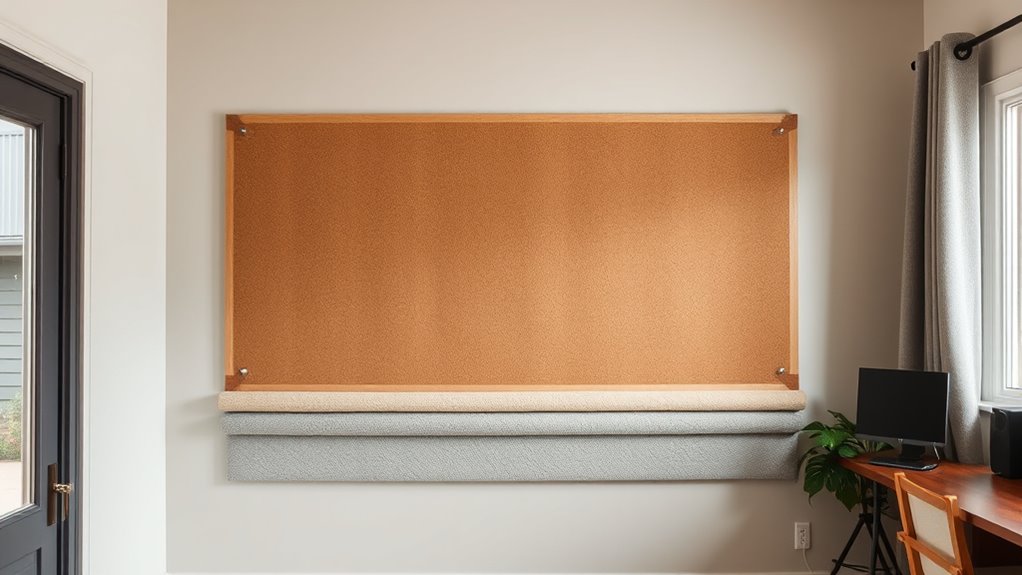
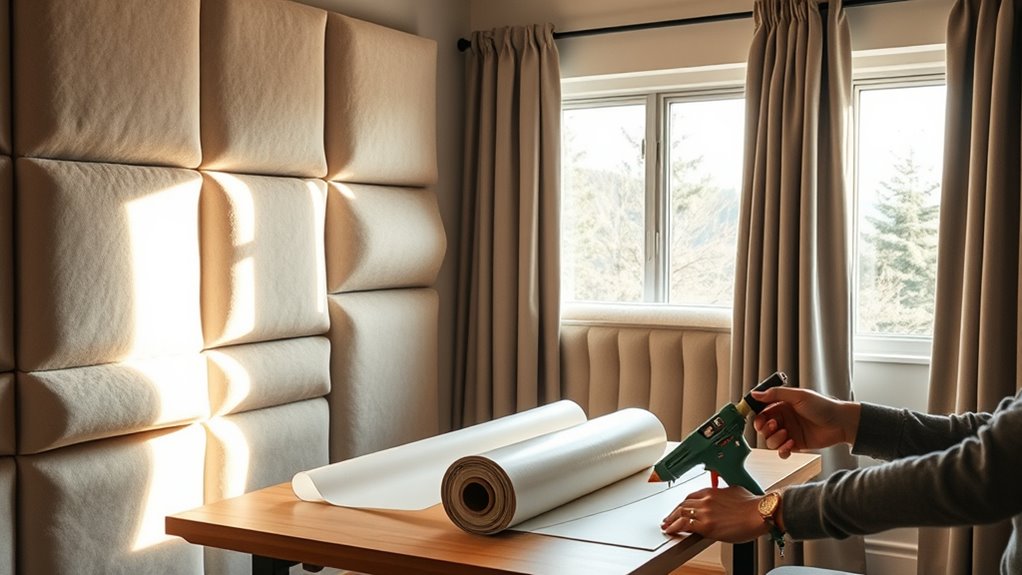
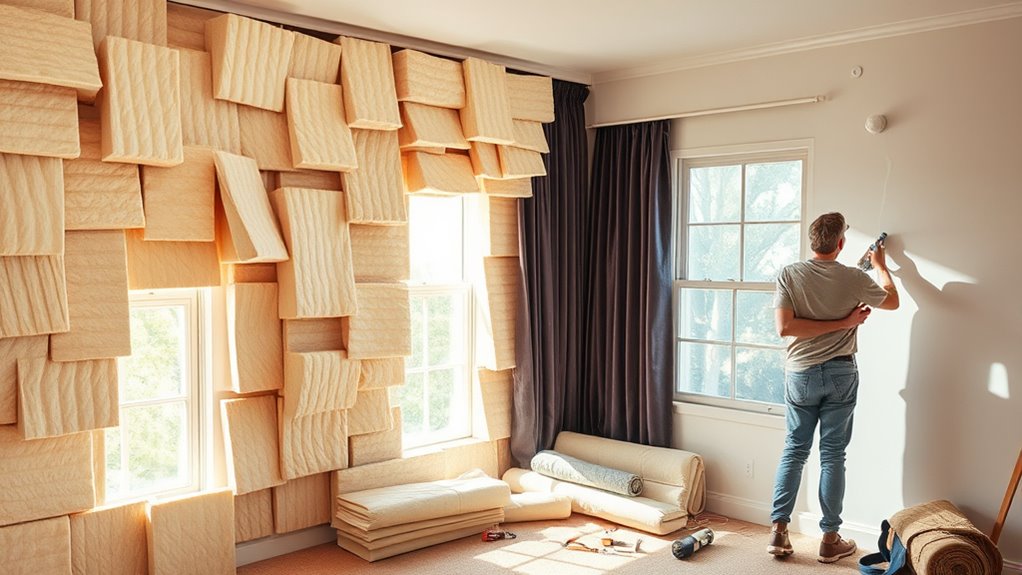
Attaching the Material to the Walls
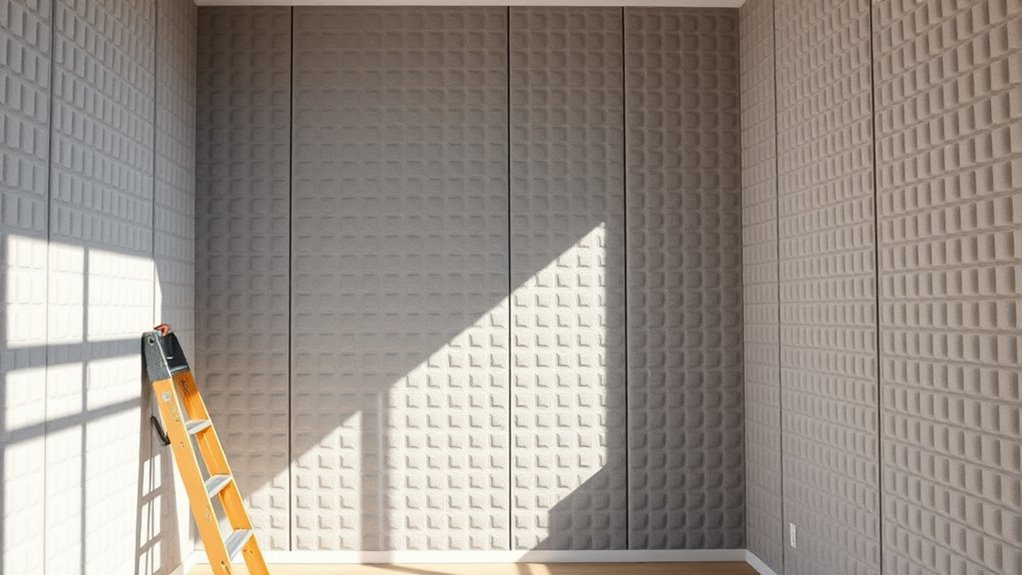
Attaching soundproofing material securely to your walls is a crucial step in reducing noise effectively. If you’re using decorative wall coverings or acoustic panels, make sure you choose the right adhesive or mounting method. For lightweight panels, double-sided tape or spray adhesive works well; for heavier acoustic panels, use screws or mounting brackets. Before attaching, clean the wall surface thoroughly to remove dust and grease, which helps the adhesive bond better. Align each piece carefully to avoid gaps or overlaps that could compromise soundproofing. Press firmly to ensure full contact with the wall. Take your time during installation to keep everything straight and flush. Proper attachment guarantees your soundproofing efforts stay secure and effective for a long-lasting, quieter space. Additionally, secure attachment is essential for maintaining the integrity of the soundproofing over time, preventing panels from loosening or falling off. Using the correct adhesive application techniques can further enhance the durability of your installation. Ensuring proper installation techniques will help maximize the effectiveness of your soundproofing project. Moreover, paying attention to material compatibility ensures that the chosen adhesives or mounting hardware work effectively with your wall surfaces and soundproofing materials.
Sealing Gaps and Edges

Have you checked for gaps or cracks around your soundproofing panels? These small openings can let sound leak through, undermining your efforts. To seal them, use weatherstripping or acoustic caulk along edges where panels meet walls or ceilings. For larger gaps, consider adding foam sealant for a tighter fit. If you’re using soundproof curtains, make sure they completely cover windows and door frames, sealing any space that might allow sound to escape. Properly sealing all edges and gaps enhances the effectiveness of your acoustic panels and soundproof curtains, creating a more airtight barrier. This simple step prevents sound from sneaking around your soundproofing materials and makes your room noticeably quieter in less time. Additionally, checking the soundproofing material’s properties can help ensure maximum sound absorption and insulation efficiency, especially if you’re aiming for optimal soundproofing performance. Understanding the sound transmission class (STC) ratings of your materials can further improve your noise reduction efforts.
Adding Extra Layers for Better Soundproofing
Adding extra layers can markedly boost your room’s soundproofing. Many soundproofing myths suggest that a single layer is enough, but multiple layers provide better acoustic treatment by reducing sound transmission. For example, adding mass-loaded vinyl or dense drywall over existing surfaces can substantially dampen noise. It’s essential to understand that layering creates barriers that sound waves struggle to penetrate. Use materials like mass-loaded vinyl, acoustic panels, or even thick blankets to add these extra layers. This approach doesn’t require complex construction — just apply additional layers to the walls, ceiling, or door. The more layers you add, the more effective your soundproofing becomes, making your space notably quieter with minimal effort. Wave and wind are important factors to consider when evaluating how sound travels through different layers.
Final Tips for Maintaining Your Quiet Space

To make certain your room stays quiet over the long term, regular maintenance and mindful habits are essential. Keep your space organized by thoughtfully arranging furniture to minimize sound reflections and avoid gaps that let noise escape. Incorporate decorative accents strategically; soft textiles like rugs, curtains, and plush cushions can absorb sound and enhance your room’s acoustics. Check periodically for any wear or damage to soundproofing layers and repair or replace as needed. Maintain a clutter-free environment to prevent sound from bouncing unpredictably. Additionally, consider updating your decorative accents to optimize sound absorption over time. Consistent upkeep ensures your quiet space remains effective and inviting, helping you enjoy a peaceful environment day after day.
Frequently Asked Questions
Will This Method Eliminate All Noise From the Room?
This method won’t eliminate all noise from the room, but it substantially reduces it through noise cancellation techniques. Adding acoustic panels helps absorb sound waves, minimizing echoes and external noise. To improve results further, combine acoustic panels with other soundproofing measures like sealing gaps and adding carpets. While it’s a practical DIY solution, complete noise elimination requires professional soundproofing, but you’ll notice a marked difference in your room’s acoustics.
How Much Does the Soundproofing Material Cost?
Imagine turning your noisy chaos into a peaceful oasis—soundproofing costs vary. You can expect inexpensive foam panels around $20 for a small room, while more durable materials like mass-loaded vinyl range from $50 to $150 per roll. The cost comparison depends on material durability and coverage needed. Investing in quality guarantees long-lasting soundproofing, making your quiet haven worth every penny.
Can I Soundproof a Rental Property Without Damage?
Yes, you can soundproof a rental property without causing property damage by using temporary solutions. Try removable acoustic panels or foam tiles that stick with non-damaging adhesive or suction cups. You can also use heavy curtains or draft stoppers to dampen noise. These options are easy to install and remove, so you won’t risk property damage, making them ideal for renters wanting a quieter space.
How Long Does the Soundproofing Last Before Replacement?
Soundproof durability varies based on the materials you choose. Generally, high-quality soundproofing materials like mass-loaded vinyl or acoustic panels last around 10 to 15 years before needing replacement. Cheaper options may degrade faster, around 5 to 7 years. To maintain peak soundproofing, inspect your setup periodically and replace worn or damaged materials promptly. Proper installation and choosing durable materials will extend your soundproofing’s longevity, saving you time and money in the long run.
Is This Technique Effective Against Low-Frequency Sounds?
This trick might not turn your room into a bass frequency fortress, but it definitely helps with sound wave absorption. You won’t completely block out those deep, rumbling low-frequency sounds, but it’ll considerably reduce them. For true bass frequency control, consider adding specialized bass traps or thicker insulation. This DIY method is a great start, especially for mid and high frequencies, making your space noticeably quieter and more serene.
Conclusion
Now that you’ve learned this simple trick, your quiet space is within reach. But don’t stop here—there’s more you can do to perfect your soundproofing. Imagine turning your room into a sanctuary of silence, all in just an afternoon. Ready to take the next step? The secret to truly blocking out noise might be closer than you think. Keep experimenting, and soon, you’ll discover the unexpected ways to silence even the loudest environments.